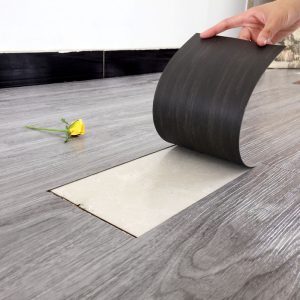
Before You Begin:
- Read and understand the manufacturer’s installation guidelines specific to your vinyl flooring product.
- Ensure you have the necessary tools and materials, including the vinyl flooring, underlayment (if required), measuring tape, utility knife, straightedge, adhesive (if needed), spacers, roller, and safety equipment.
Step 1: Prepare the Subfloor:
- Ensure the subfloor is clean, dry, and level. Remove any existing flooring, nails, or debris that could affect the installation.
Step 2: Acclimate the Flooring: 2. Allow the vinyl flooring to acclimate to the room’s temperature and humidity for at least 48 hours before installation. Keep the boxes unopened during this time.
Step 3: Plan the Layout: 3. Plan the layout of the vinyl planks, starting from the longest wall. Consider the direction of the planks and the visual flow in the room. Use spacers along the walls to maintain an expansion gap.
Step 4: Install Underlayment (If Needed): 4. If your vinyl flooring requires an underlayment, follow the manufacturer’s instructions for installation. Some vinyl products come with a built-in underlayment or padding.
Step 5: Begin Installation: 5. Start in a corner of the room, placing the first vinyl plank with its tongue side facing the wall. Leave a 1/8-inch gap between the plank and the wall.
Step 6: Continue Plank Installation: 6. Connect the second plank’s short end to the first plank’s long side, angling the plank down and clicking it into place. Use a tapping block and a mallet to ensure a snug fit.
Step 7: Stagger the Planks: 7. As you continue installing planks, stagger the joints by starting each row with a plank that’s at least 6 inches longer than the last plank in the previous row. This creates a more natural look.
Step 8: Cut Planks to Fit: 8. Measure and mark planks that need to be cut to fit at the end of rows or around obstacles. Use a utility knife and straightedge to make precise cuts.
Step 9: Install the Last Row: 9. In the last row, measure and cut planks to fit against the wall. Remember to leave the 1/8-inch expansion gap.
Step 10: Finishing Touches: 10. Remove spacers and check that the planks are snug and properly aligned. Install transition strips as needed at doorways or between different flooring types.
Step 11: Roll the Flooring: 11. Once all planks are in place, use a flooring roller to press down on the entire floor. This ensures a secure bond between the planks and the subfloor.
Step 12: Clean Up: 12. Clean up any adhesive or debris, and replace furniture and accessories in the room.
Step 13: Enjoy Your New Floor: 13. Admire your completed DIY vinyl flooring installation. Your new floor is now ready to enhance your space.
Remember that each vinyl flooring product may have specific installation instructions, so always refer to the manufacturer’s guidelines for the most accurate and up-to-date information. If you’re unsure about any step of the process, it’s a good idea to consult with a professional or seek guidance from experienced DIYers.


